Cannabis
How to Smoke a Joint for the First Time
Smoking weed for the first time can be an intimidating process. Getting high off a joint should be a fun and exciting experience. We want to make sure you have the right resources for preparing, rolling, and smoking your first joint.
There are many ways to consume marijuana. If it’s your first time, you may want to stick with a pre-rolled joint from a dispensary. This is a perfect option, as lighting a pre-rolled joint is straightforward and allows you to easily control how much you intake. If you don’t have the option of buying a pre-roll, learning how to successfully roll up your very own doobie takes a bit of practice but is doable and pays off in the end. It’s a good feeling when you develop your rolling skills over time and perfect the craft.
If the time has come to take the next step, keep reading for an easy-to-follow breakdown of how to navigate the process of rolling and smoking your first joint. These seven steps will give you a solid start and address any questions you may have. There are a few items you will need that can be purchased at a dispensary. They include joint papers, filters, a grinder, and your choice of bud. You can also ask your local dispensary’s budtender for any tips or guidance they can offer.
If this is your first time smoking, it is advised you start with a small amount to get used to the effects marijuana may have on your body. Everybody is different, and smoking weed can have varying effects on users. It also is recommended to be with a friend or someone you trust and are comfortable around. This is important if you wish to have a positive experience, as the environment will have an impact on your first time getting high.
Rolling and Smoking Your First Joint
1. Break the Bud Down
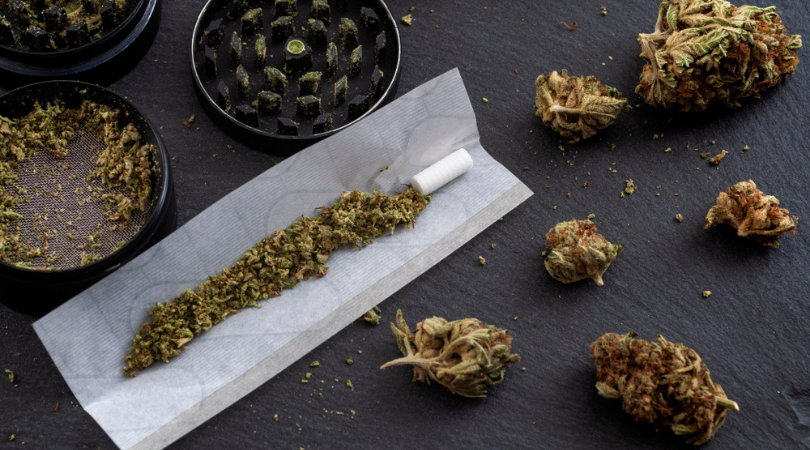
The first step starts with preparing your weed for the joint. You will need to thoroughly break down the bud, and a grinder is essential for this. This is very important because the consistency of your weed affects the way your joint will burn when smoked. Grinding your weed down also creates structure and solidity in your joint. Nobody likes a floppy doobie.

2. Making the Filter
Take a piece of filter paper and make two small folds (accordion style) but only on one end of the paper. You then wrap the rest of the paper tightly around the creased shape you made. This ensures there are no gaps. You want to create a barrier, so that no weed falls out into your mouth, but also allows airflow. Putting a filter in your joint creates a nice mouthpiece and offers additional support to the structure. This way, you have something firm to hold onto while smoking and can avoid burning your fingers.
3. Adding the Weed
Make sure you buy quality rolling papers. Place your filter on either end of the paper lining up with the edge. Now, you are ready to add the ground-up marijuana so that it fills the rest of the paper. When this step is done, you can then start shaping your joint.
4. Tucking
This is the more technical part and crucial to how your joint will turn out. It is an important step that takes some practice. Getting good at this is the foundation for overall joint quality. Begin at the filter-end of your joint and use your thumb to tuck the paper in around your filter. As you do this, move your way down with your thumb as you continue to tuck the rest of the joint. Be careful in using too much pressure to avoid tearing your rolling paper.
5. Roll and Seal
After your weed is nicely tucked away in your paper, you may begin to roll. Do this gently and keep an even pressure on your fingertips. Stop just before reaching the edge that has the strip of glue. Use your tongue and glide it across the glue end. After this, you can finish rolling your joint and pat down on the seal to ensure it sticks together. Before twisting off the end, you should use a small poker and push it down the open end of the joint to compress the weed inside. You want it firm, but don’t overpack too tightly, as this can block airflow. When done with this step, you can twist the end opposite of the filter closed. You are now ready to light up.

6. Lighting Your Joint
Put your lips around the filtered end of the joint as you would with a cigarette. Use a lighter to light the twisted end of the joint while simultaneously drawing smoke into your mouth. After you gather smoke in your mouth, inhale by taking a breath of fresh air. This clears the smoke into your lungs, which you can then exhale. Make sure the end is lit evenly for an even burn.
7. Smoking the Doobster
It is recommended to keep the smoke in your lungs for a few seconds before exhaling. When exhaling, remove the joint from your lips and take in fresh oxygen. As you smoke your joint, also leave a few seconds in between puffs. This gives the joint a chance to cool off after being hit, resulting in a slow burn.
Effects
It is a good idea to hold off on smoking the entire joint. It takes a few minutes for the full effects of marijuana to kick in. Start with a few puffs and wait to see how you feel. This ensures you don’t take more than you’re comfortable handling. If you find that you are too high, taking a cold shower or napping can help. You cannot overdose and die from smoking weed, so sit back, relax, and enjoy your very first joint. After mastering joints, you can move on to giving blunt rolls a try.


